When OpenAI announced ChatGPT Plugins in March, it took the world by storm.
Plugins are a way to extend the functionality of ChatGPT by adding new features and capabilities. They can be used for anything from browsing the web to brainstorming a grocery list on Instacart, and more.
A few days after ChatGPT Plugins was announced, I built a free ChatGPT Plugin that helps you brainstorm domain ideas by automatically checking if they are available inside ChatGPT.
Today – roughly a month later – that Plugin was added as an official plugin on the ChatGPT Plugin store, and will soon be accessible by all 1B+ users on ChatGPT.
So...how can I build one?
Thanks to how intuitive the developer experience of building a ChatGPT Plugin is, it's actually not too complicated to build one yourself.
In essense, all you need to build a ChatGPT Plugin is:
- Your API backend
- A Plugin manifest file
- An OpenAPI spec
In this article, we'll walk through the process of building a ChatGPT Plugin using Next.js and deploying it to Vercel.
Quickstart
Here's the repo for the plugin we'll be building in this article:
You can also clone & deploy it to Vercel with one click.
About the Plugin
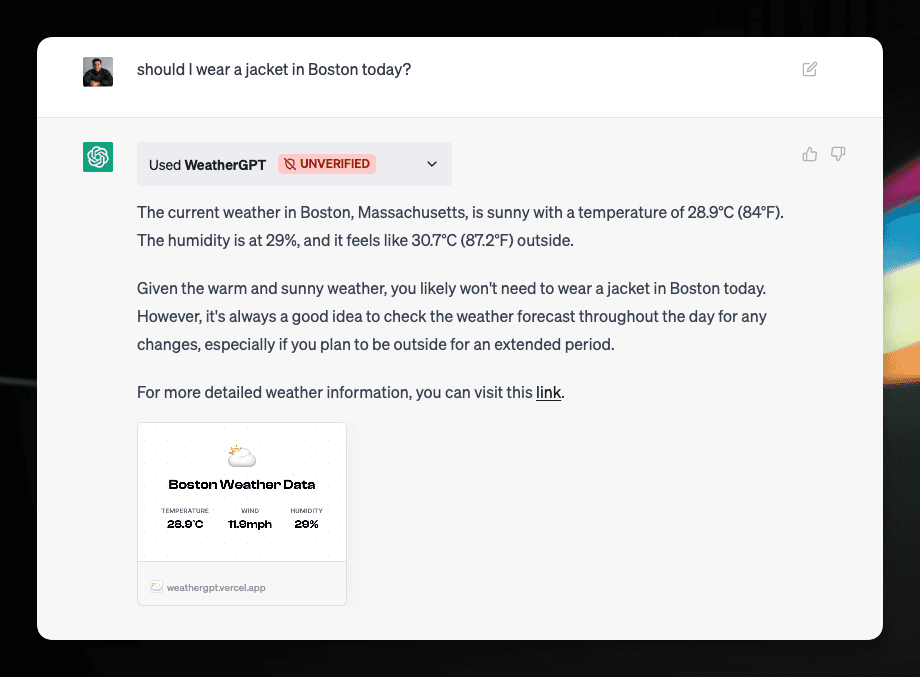
The ChatGPT Plugin we'll be building in this article is WeatherGPT – a plugin to get the weather of any given location.
It can also make appropriate recommendations of what outfits to wear given the weather.
E.g. "Should I wear a jacket in Boston today?"
If you have access to Plugins, you can try this plugin out!
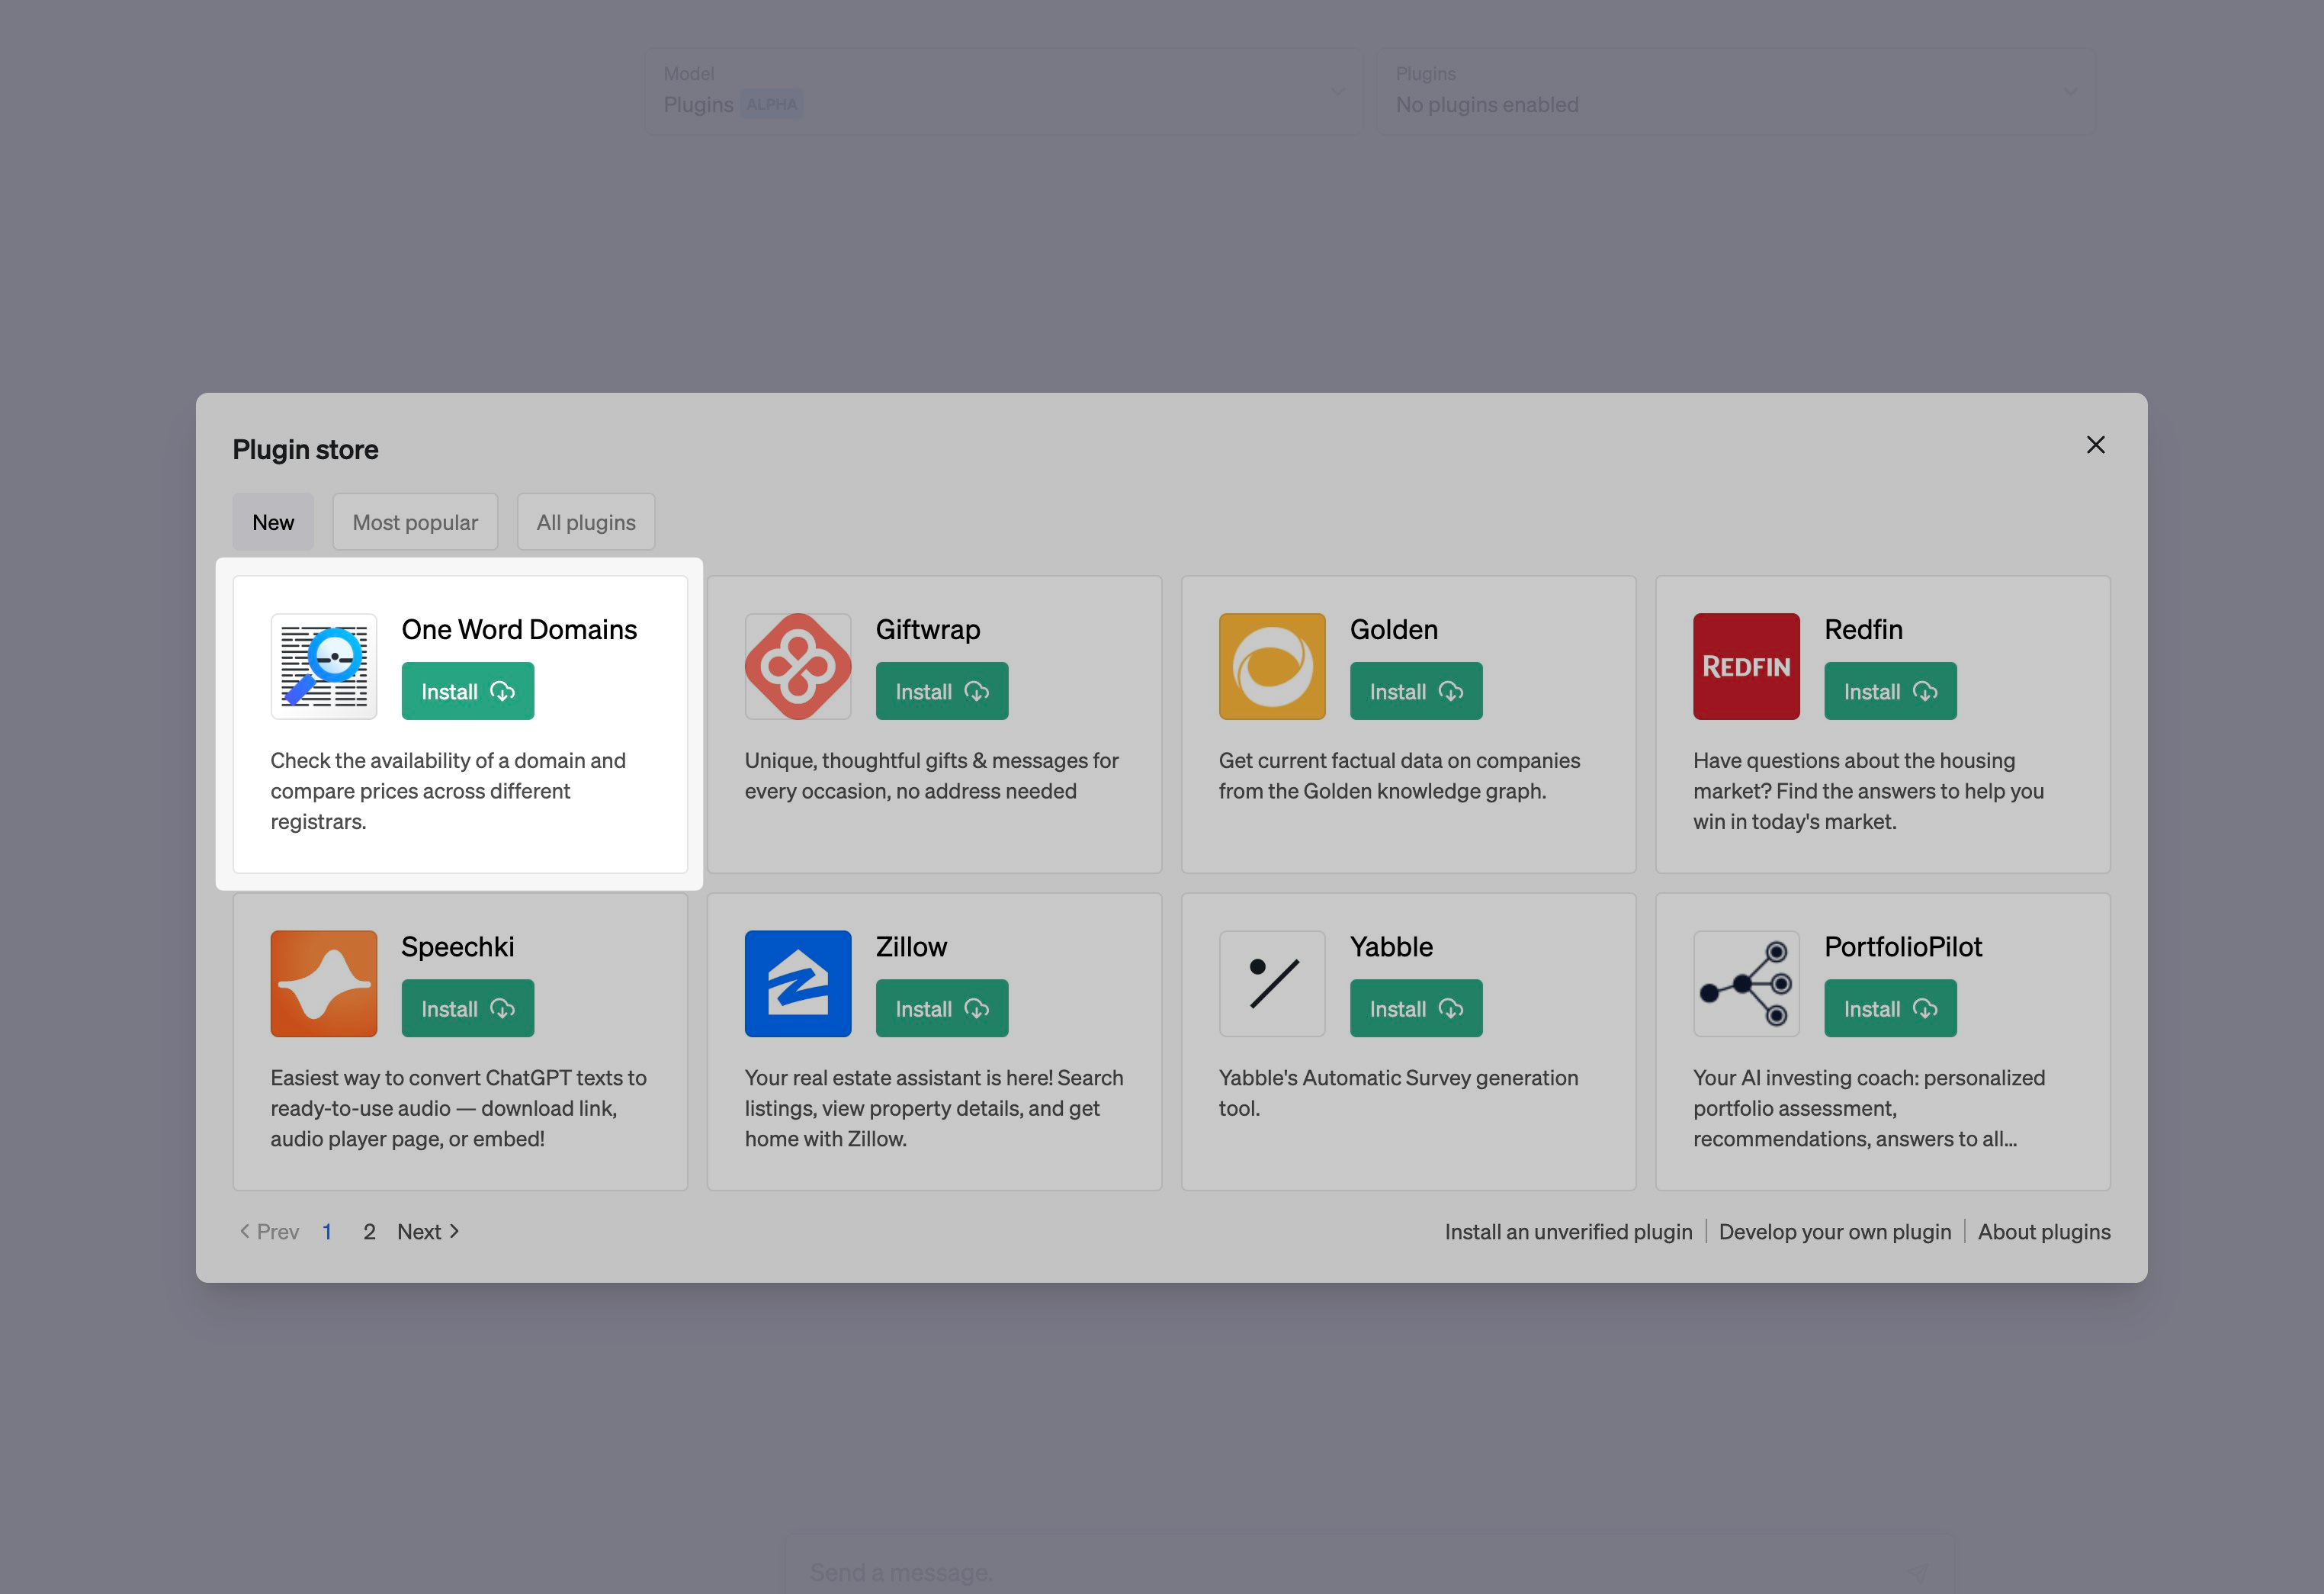
- Go to the Plugin Store
- Click "Install an unverified plugin"
- Enter "https://weathergpt.vercel.app"
- Click "Install".
Tech Stack
Here's the tech stack that we'll be using to build our ChatGPT Plugin:
- Next.js for the API backend
- Edge Functions for retrieving and returning weather data
- ImageResponse API for generating dynamic OG images
- Vercel for hosting and deployment
1. API Backend
Thanks to Next.js' Route Handlers, it was fairly simple to build the API backend for WeatherGPT.
import { NextRequest, NextResponse } from "next/server";
import { geolocation } from "@vercel/edge";
import { getWeatherData } from "@/app/lib/utils";

export const runtime = "edge";

export async function GET(req: NextRequest) {
  let location = req.nextUrl.searchParams.get("location");
  if (!location) {
    const { city } = geolocation(req);
    location = city || "San Francisco";
  }

  const response = await fetch(
    `http://api.weatherapi.com/v1/current.json?key=${process.env.WEATHER_API_KEY}&q=${location}&aqi=no`
  ).then((res) => res.json());

  return NextResponse.json({
    ...response,
    infoLink: `https://weathergpt.vercel.app/${encodeURIComponent(location)}`,
  });
}
Here, we are using the WeatherAPI to retrieve weather data for a given location.
In the case where there is no location parameter provided, it will use Vercel's geolocation API to determine the user's location and return the accurate weather data based on that.
To try this out, go to https://weathergpt.vercel.app/api/weather to get a JSON response of the weather in your city – or https://weathergpt.vercel.app/ if you want a pretty UI.
2. Plugin Manifest File
Your plugin manifest file should be located in the /.wellknown/ai-plugin.json directory on your site.
This is similar to manifest.json for a Chrome Extension, except for 1 main difference: Your description is key – it's the prompt for your Plugin. You gotta engineer the sh*t out of it.
This is the description for WeatherGPT:
Use the WeatherGPT plugin to automatically fetch current weather information for a specific location when it's being generated by the ChatGPT assistant. The plugin will return weather data, including temperature, wind speed, humidity, and other relevant information, as well as a link to a page that has all the information. Links will always be returned and should be shown to the user. The weather data can be used to provide users with up-to-date and accurate weather information for their desired location.
And here's the full plugin manifest file:
{
  "schema_version": "v1",
  "name_for_model": "WeatherGPT",
  "name_for_human": "WeatherGPT",
  "description_for_human": "Get current weather information for a specific location.",
  "description_for_model": "Use the WeatherGPT plugin to automatically fetch current weather information for a specific location when it's being generated by the ChatGPT assistant. The plugin will return weather data, including temperature, wind speed, humidity, and other relevant information, as well as a link to a page that has all the information. Links will always be returned and should be shown to the user. The weather data can be used to provide users with up-to-date and accurate weather information for their desired location.",
  "api": {
    "type": "openapi",
    "url": "https://weathergpt.vercel.app/openapi.json",
    "has_user_authentication": false
  },
  "auth": {
    "type": "none"
  },
  "logo_url": "https://weathergpt.vercel.app/logo.png",
  "contact_email": "stey@vercel.com",
  "legal_info_url": "https://weathergpt.vercel.app/legal"
}
3. OpenAPI Spec
This is a standard OpenAPI spec, with a stronger emphasis on the "description" fields for all endpoints. It's location should match the api.url field in your plugin manifest file (e.g. /openapi.json).
Here's the OpenAPI spec for WeatherGPT: https://github.com/steven-tey/weathergpt/blob/main/public/openapi.json
Pro-tip: Get GPT-4 to write it for you → https://sharegpt.com/c/lZRyrWG
Dynamic OG image cards
To make the plugin more visually appealing, we can use Next.js' ImageResponse API to generate dynamic OG image cards for each weather location, which will be returned as a nice card link inside ChatGPT (as seen above).
Here's the code I'm using for the dynamic OG images in WeatherGPT.
You can also refer to Vercel OG image generation docs for more information.
Securing Your API Endpoints
To prevent unauthorized access to your API endpoints, you can whitelist OpenAI's IP CIDR blocks.
Here's a simple code snippet you can use to veirfy that the request is coming from OpenAI:
function ipToInt(ip: string) {
  return ip.split(".").reduce((acc, octet) => (acc << 8) + parseInt(octet), 0);
}

function isIpInCIDR(ip: string, cidr: string) {
  const [cidrIp, prefixLength] = cidr.split("/");
  const mask = -1 << (32 - parseInt(prefixLength));
  const ipInt = ipToInt(ip);
  const cidrIpInt = ipToInt(cidrIp);

  const networkAddress = cidrIpInt & mask;
  const broadcastAddress = networkAddress | ~mask;

  return ipInt >= networkAddress && ipInt <= broadcastAddress;
}

export default function validChatGPTIp(ip: string) {
  // verify both CIDR blocks from the docs: https://platform.openai.com/docs/plugins/production/ip-egress-ranges
  return (
    isIpInCIDR(ip, "23.102.140.112/28") || isIpInCIDR(ip, "23.98.142.176/28")
  );
}
Testing Your Plugin & Deploying it to Production
Before deploying your plugin to production, you can test it using the following tools:
- Ngrok tunnel to your localhost instance
- Vercel Preview URLs
Once you're satisfied with your plugin's functionality, add it to ChatGPT with the following steps:
- Go to the plugin store.
- Click on "Develop your own plugin".
- Enter your plugin's domain.
- Click on "Find Manifest File" > "Next" > "Install for me".

Here's a video of WeatherGPT in action:
Conclusion
The developer experience for building a ChatGPT Plugin is sublime.
I went into it expecting to write code logic to tell ChatGPT what to do. I ended up writing mostly natural language and everything just worked.
It really takes declarative programming to the next level. The closest analogy I can think of:
- JavaScript/jQuery → React/Next.js
- Chrome Extension development → ChatGPT Plugin development
Instead of writing imperative JS code, you describe what you want ChatGPT to do. The rest is history.
Update (May 17)
It's been two weeks since One Word Domains' ChatGPT Plugin went live on the Plugin Store, and I've been blown away by the response.
Here's my favorite tweet so far:
Also love the creative how folks are at prompting ChatGPT + the plugin to generate domain names:
It's also been used over 17K times to brainstorm available domain names on ChatGPT and generated $657 in affiliate revenue in the process:
Additional Resources
- The official ChatGPT Plugin Docs by OpenAI
- GPT Plugins: A ChatGPT Plugins directory by Krish